I’m often asked how to do certain things, especially with images. Many clients don’t have graphic programs, so I’ve decided to start a series of posts that will help you do basic edits to images using Pixlr, which is a free, online image editor.
I’m going to start with a very basic edit – Canvas Size. Many times, you want to maintain certain image sizes on your website, whether it be for a product photo, a blog post, or anywhere. Here I will outline the steps to add extra to your image so that the height & width are the same.
1. Go to the Pixlr Editor site
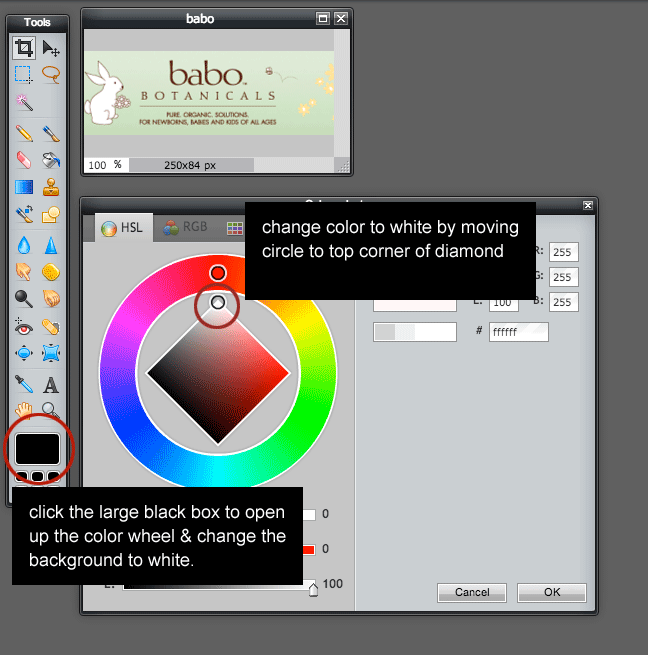
2. Change the background color to white (or whatever your current background color is)

2. Select Canvas Size from Image Menu

3. Change anchor point for current image & choose your final canvas size. Your anchor point is where the current image will be set, and the additional size will be added around that point.

4. Save File: Make sure to save it in a place on your computer that you will know where it is.
Next in this series will be: How To Resize An Image Using Pixlr.
Do you have any questions on editing images? Let me know in the comments & it could be a future post!

